Loading...


Let our Amazon experts show you how to leverage the power of ZonGuru to smash your sales goals. You’re invited to a 15-minute Rocket Demo so you can see the ZonGuru tools first-hand.
Book your seat now!
As an Amazon seller, there are lots of tasks that require your attention to increase sales. Creating promotions, focusing on product listing optimization, and keeping up with the latest news from Amazon are just a few. However, have you considered incorporating Amazon’s giveaway into your marketing strategy?
There are plenty of Amazon giveaways that can bring you a return on your investment. For instance, running a giveaway will increase your brand and product exposure when promoted by Amazon. Running giveaways also shows your appreciation to your customers by giving them prizes. Moreover, Amazon’s A9 algorithm rewards you within their ecosystem when you use its promotion functionality – rather than driving traffic through 3rd party tools. Here are 8 steps you can follow to set up your own Amazon giveaway to drive more sales and profits for your business.
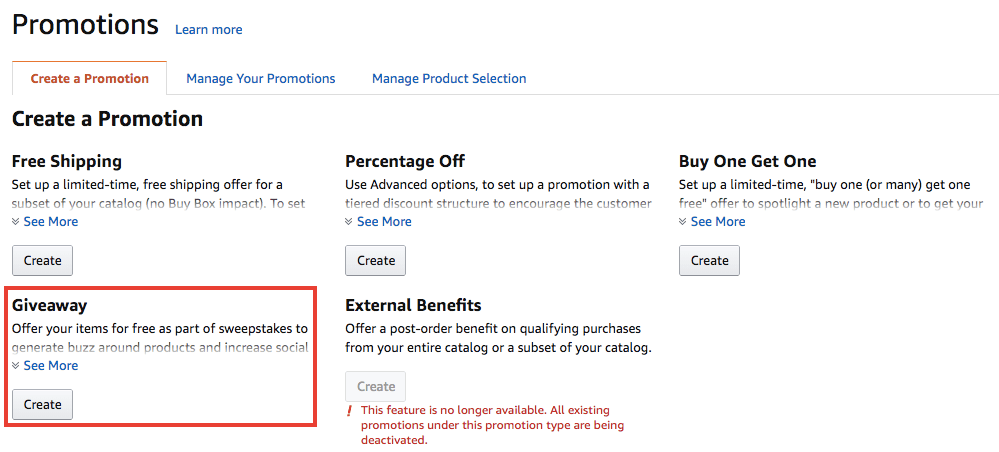
The first step in setting up a giveaway on Amazon is to, sign in to your Seller Central and navigate to ‘Promotions’ under the ‘Advertising’ tab. You will find the ‘Giveaway’ option as shown in the image above. Click the ‘Create’ button to get started.
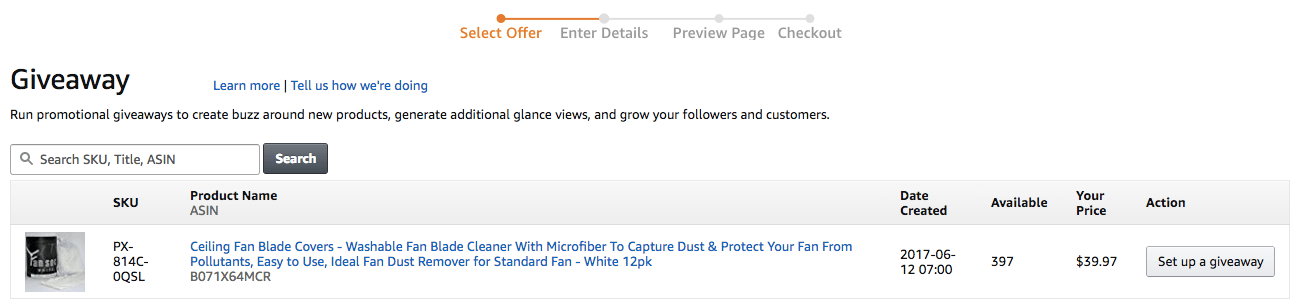
You will then be prompted to either search for, or choose a product you want to use as a prize in the giveaway. Paste the ASIN number in the search bar and click on the ‘Set up a giveaway’ button.
Pro Tip: You can only select one SKU per giveaway.
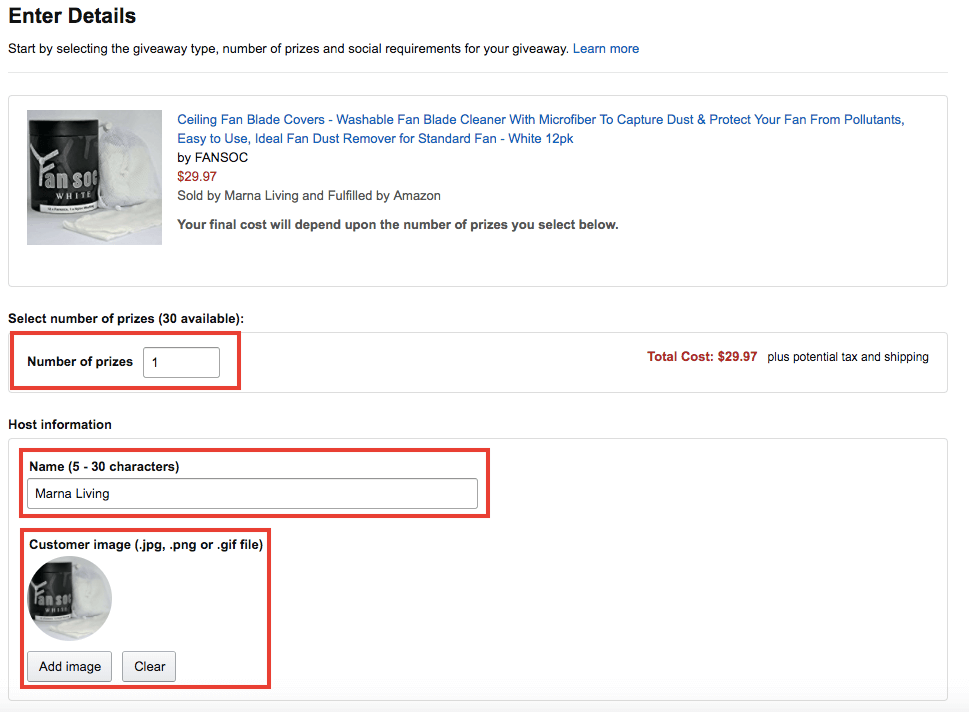
The next step is to enter the number of prizes you are willing to purchase and use for the giveaway. You can select a minimum of 1 and a maximum of 30 products for the giveaway.
Pro Tip: You can split test the amount of product(s) to give away on Amazon and focus on what works best for you. I personally find that 3 is the magic number.
You will need to enter your business name and also select an image that is congruent with your product. I highly suggest using the main image that you used for your product listing to maintain consistency.
Step 4 is to select your giveaway type from 4 different selections provided by Amazon.
1. The first one is Sweepstakes where the prize will be awarded randomly to the winner(s) once the giveaway has ended.
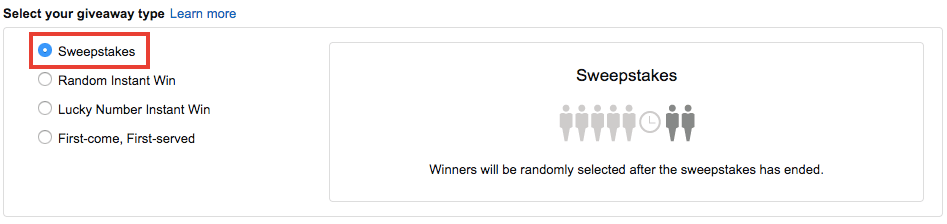
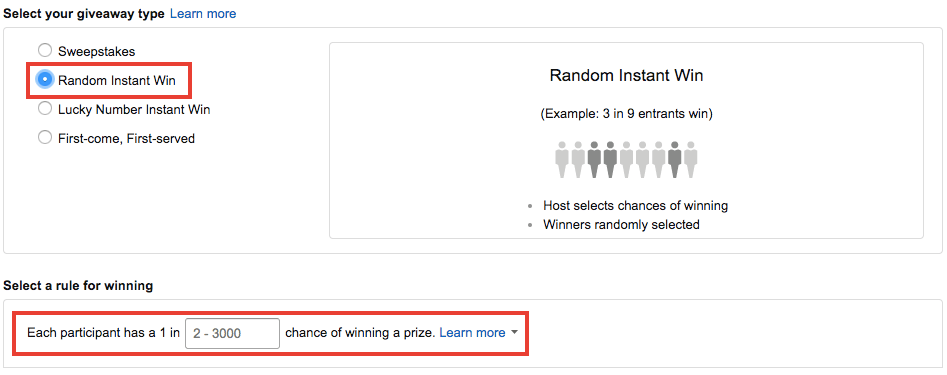
2. The second type of giveaway is Random Instant Win . This is one of my favorites to run where you select chances of winning for participants and the final winner or winners are randomly selected. For instance, each participant has a 1 in 1000 chance of winning a prize. You’d want to make the winning odds logical for participants to enter and also for you to get enough exposure for your products so test it out and find that sweet spot.
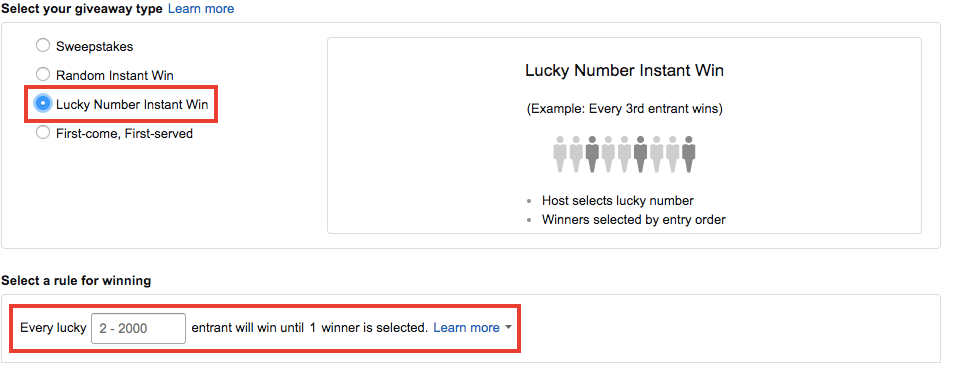
3. The 3rd type of giveaway is Lucky Number Instant Win . This is another great Amazon giveaway promotion to run where you select a lucky number or a few numbers depending on the amount of prizes you’re giving away. Similar to random instant win, you are required to enter the rule of winning and be sure to keep the winning odds logical to attract more participants.
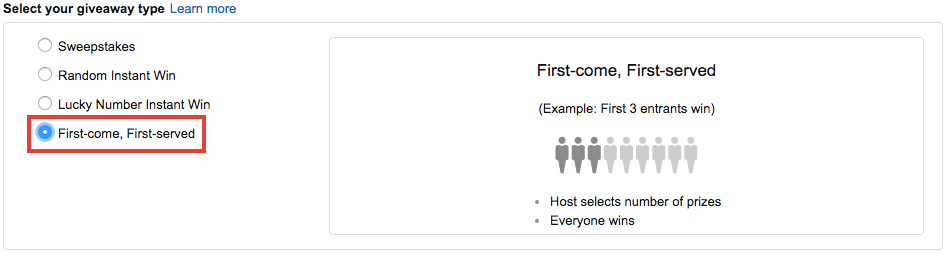
4. The last type of giveaway is First-come, first-serve . This giveaway is pretty much self-explanatory. I wouldn’t suggest running this type of giveaway because you won’t get enough product exposure. For instance, you are giving away 3 prizes and in the end, only 3 participants will know about your product. It doesn’t quite make sense to run this type of giveaway, well, at least for me.
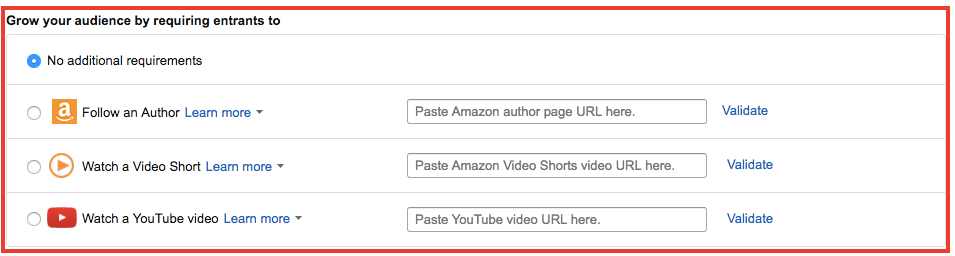
Running a giveaway is a fantastic way to build your social media following on sites like Youtube and Amazon Author profile. Step 5 is to select requirements for joining the giveaway. You can grow your audience with any of these 3 requirements for entrants to enter the giveaway.
Pro Tip: Be sure to use the right tags in the backend for your Youtube video, country, language, and other details for SEO purposes.

Once you’ve selected the type of giveaway you’d want to run. You now need to set the duration of the giveaway. After countless A/B testings, I’d highly suggest nothing below 3 days and nothing more than 5 days. Reason being, 1 or 2 days isn’t enough to get traction and anything more than 5 days, the number of entrants will be saturated.
There are many giveaways being run every hour and those listings will push yours down. Keep in mind that you will be automatically reimbursed for all giveaway prizes not awarded at the end of the giveaway period (which is a maximum of seven days).
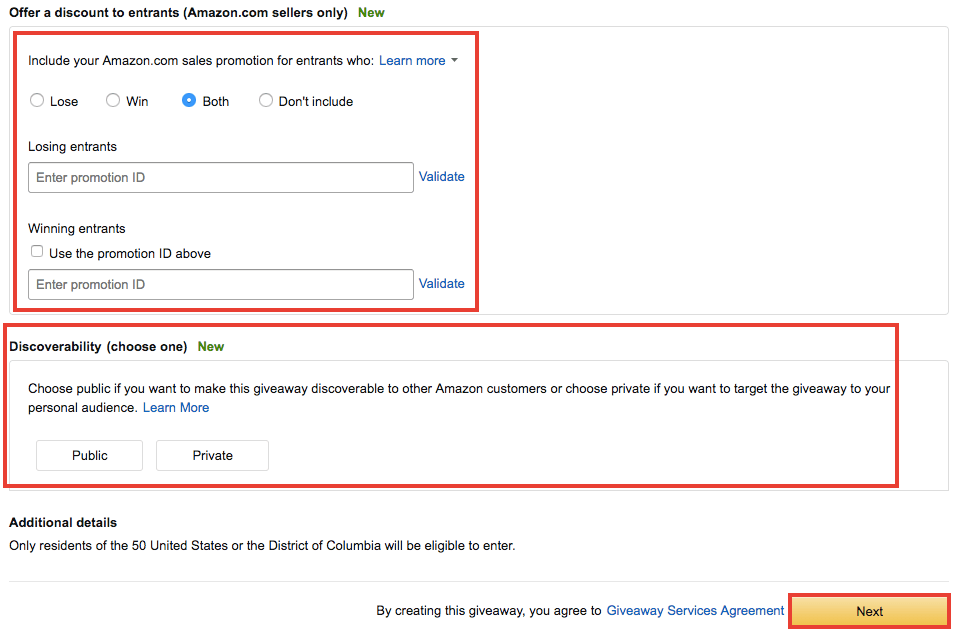
The next step is to enter discount messages for entrants and select giveaway discoverability. It is important to use this functionality and offer a godfather discount to both losing and winning entrants. First, you need to enter the promotion ID which you can obtain from your promotion settings. Keep in mind that the promotion ID used has to be live so that Amazon can successfully validate your ID.
You are allowed to enter a message to both losing and winning entrants. Use your copywriting skills to entice entrants to check out your products and ultimately make a purchase.
Pro Tip: The higher the discount, the more sales you will generate from the giveaway. As long as you are profiting then it is worth it to give out a discount coupon because more sales equal increased in Amazon sales rank plus you get to grow your social media channels depending on which requirements you chose for entrants to participate.
Next is the discoverability section which you can either choose to have your giveaway Public or Private. If you have a huge list of followers and only want to run this giveaway for them, then set this to private so the link shared is only amongst your followers. If you just launch a new product and want to generate more sales so you can increase sales velocity and reviews then setting your giveaway to Public is the way to go. Click the next button once you have completed all details.
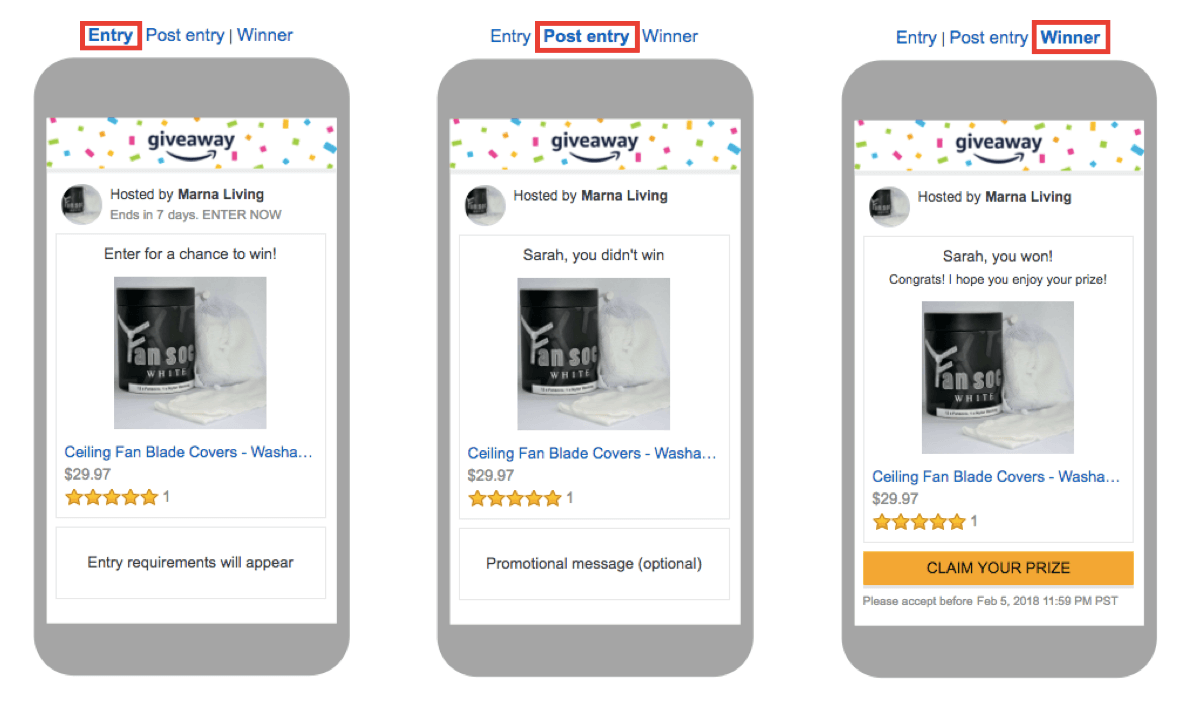
The last step is to finalize and preview your Amazon giveaway and then proceed to checkout. Once payment is complete, you will receive a confirmation email from Amazon and a second email once your giveaway is live. A unique giveaway URL included in the email can be shared amongst your audience to further increase the engagement rate.
Pro Tip: Keep track of your metrics (e.g. sales volume) during and once the giveaway has ended so you know exactly which type of giveaway work for you.
Hopefully, this step-by-step guide shows how simple it is for you to set up your very own Amazon giveaway to increase sales and profits. Have you run an Amazon giveaway for your business? Let us know in the comment box below how it went.
Discover opportunities. Maximize your sales. Grow your Amazon business!

Free score in 2 minutes. See how Amazon's AI reads your listing and what to fix.
 Run my Free Score
Get started with ZonGuru, access all the tools with a FREE trial.
.webp) Start FREE Trial
Start FREE Trial